Setup mail domain
1. Log in to the Mailu Admin UI
Open your browser to your admin URL, e.g.
https://mail.hrdtechnology.com/admin
Sign in with your admin credentials.
2. Navigate to the “Domains” Section
On the left‑hand menu, click “Domains”. This page shows all domains Mailu knows about.
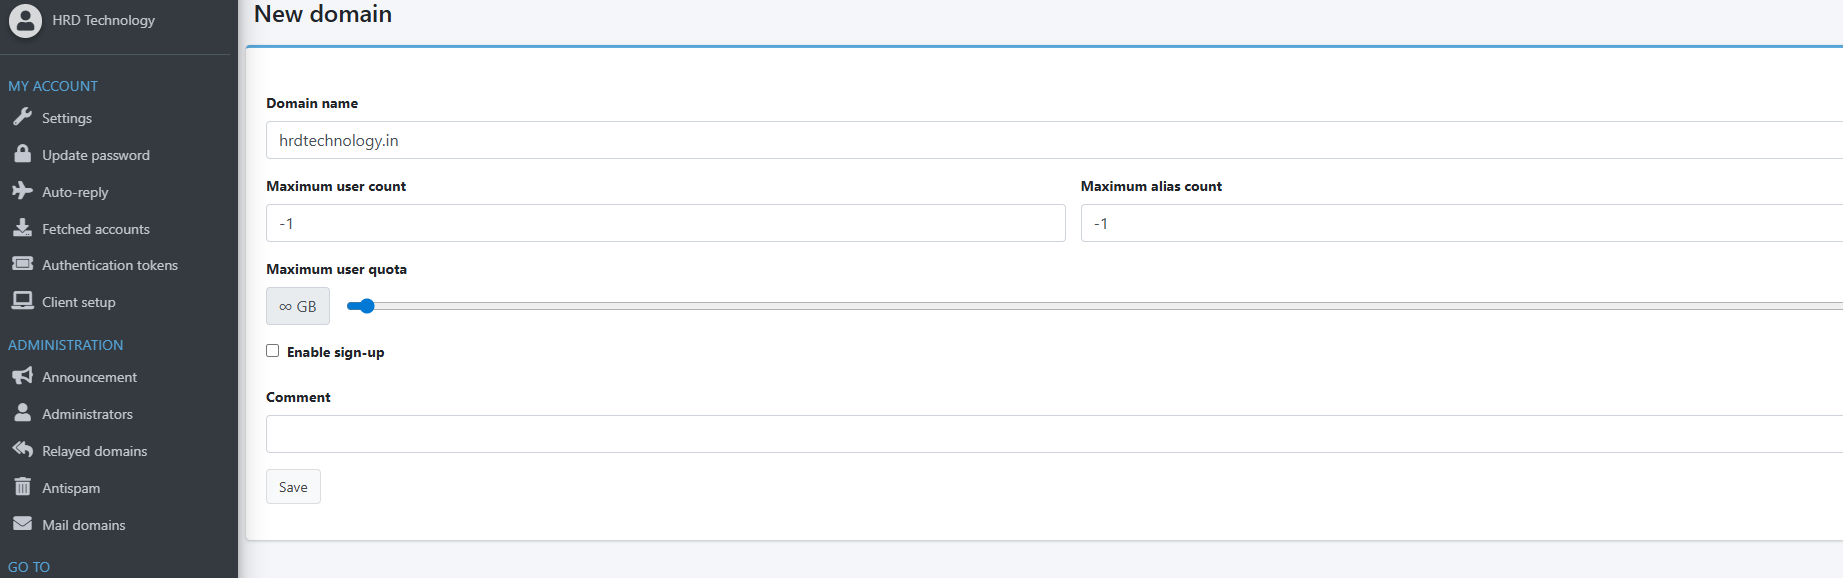
3. Add a New Domain
-
Click the “+ Add Domain” button.
-
In the form that appears:
-
Domain name: enter your domain (e.g.
hrdtechnology.com) -
Description (optional): e.g. “HRD Technology primary mail domain”
-
Catch‑all address: leave blank (unless you want all unknown addresses forwarded)
-
-
Click “Save”.
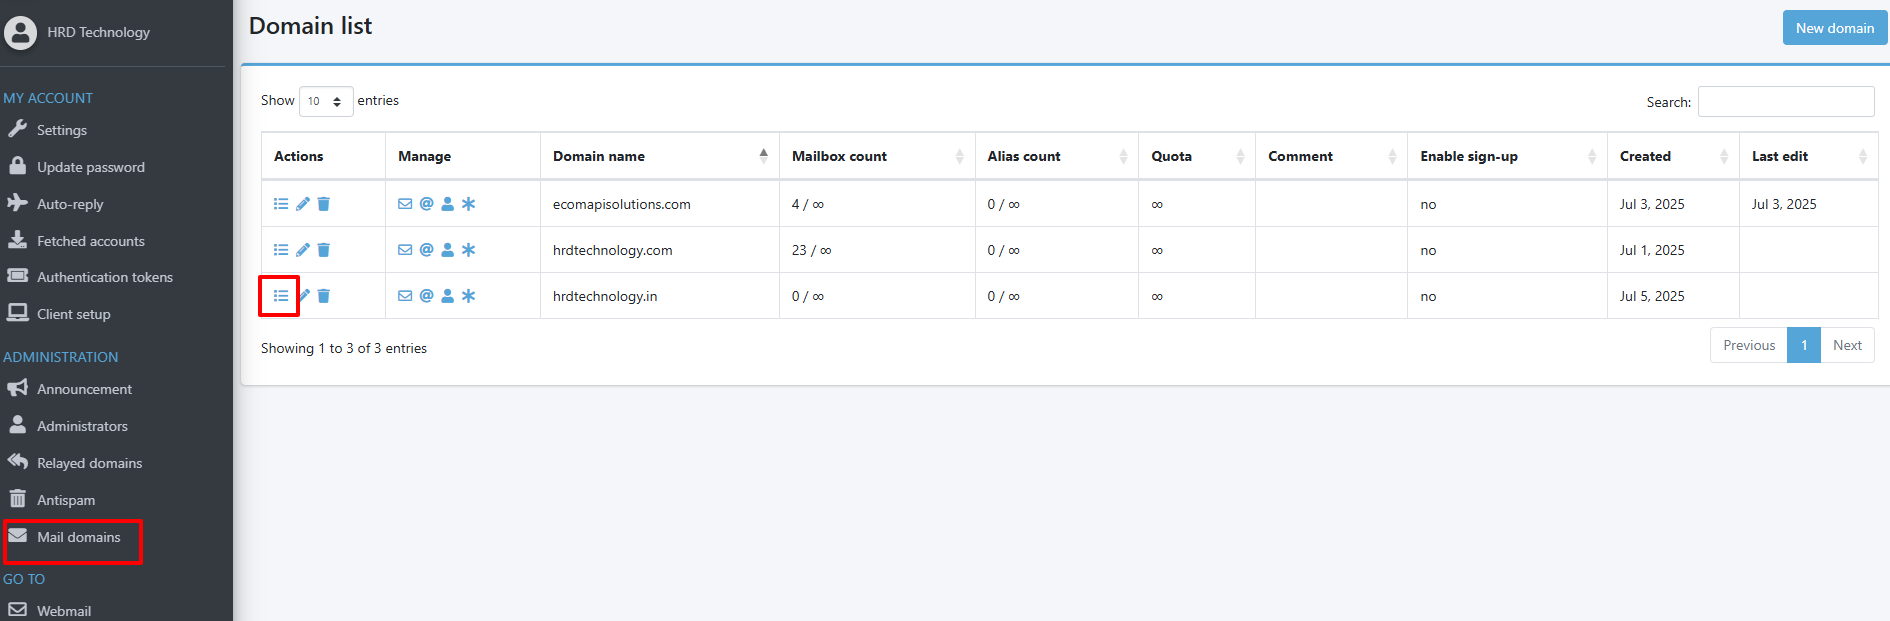
4. Configure DNS Records
Once the domain is created. Mailu will display all the domain list select the domain list that you want to setup the dns
Once you click on that it will show the dns record page like bellow, generate the generate keys button to generate the dkim key (it will prevent mail to goes in span)
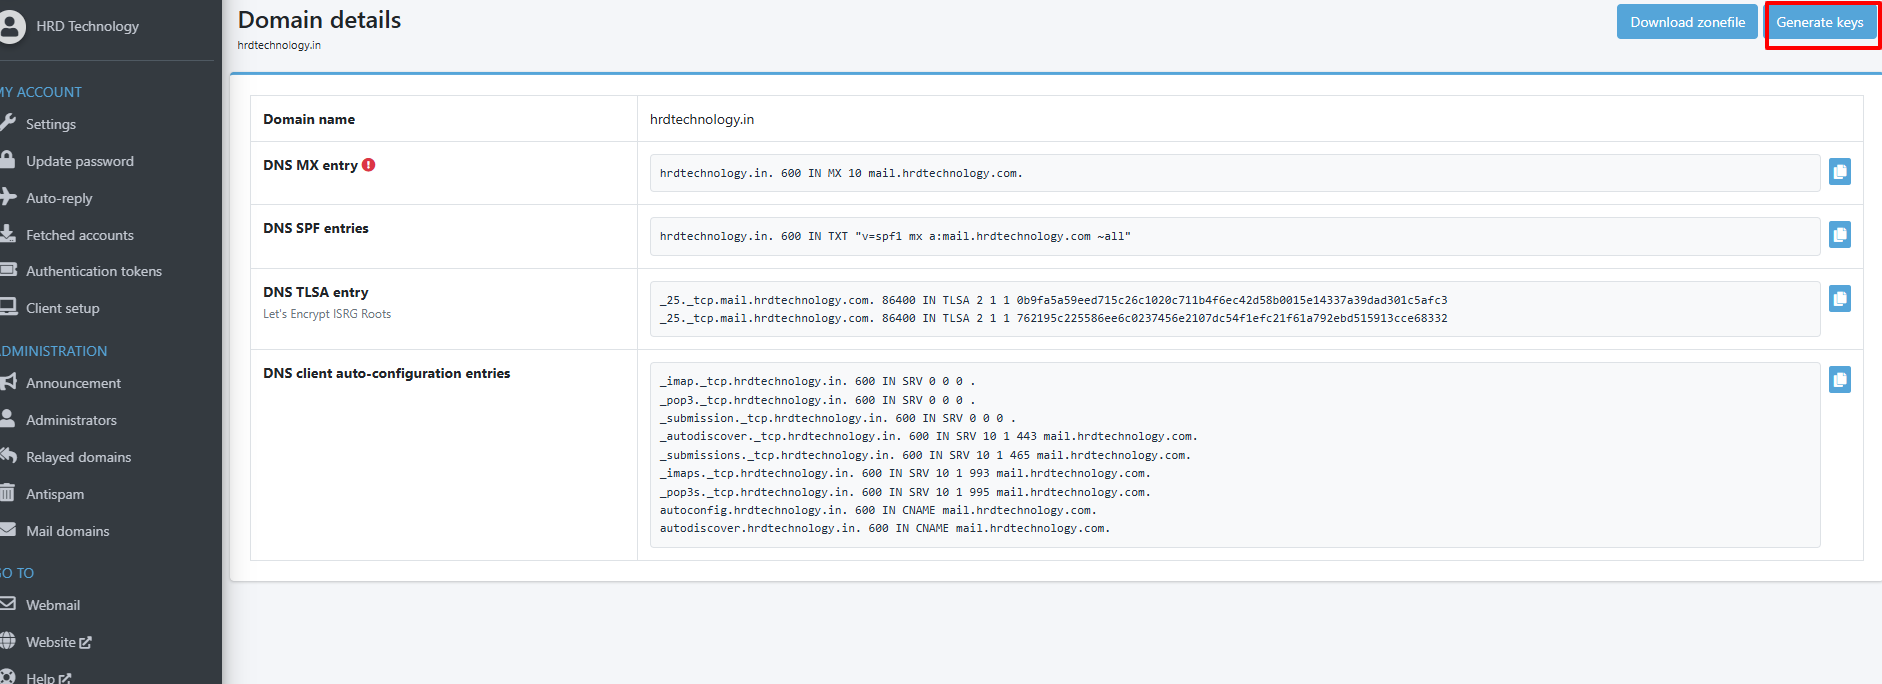
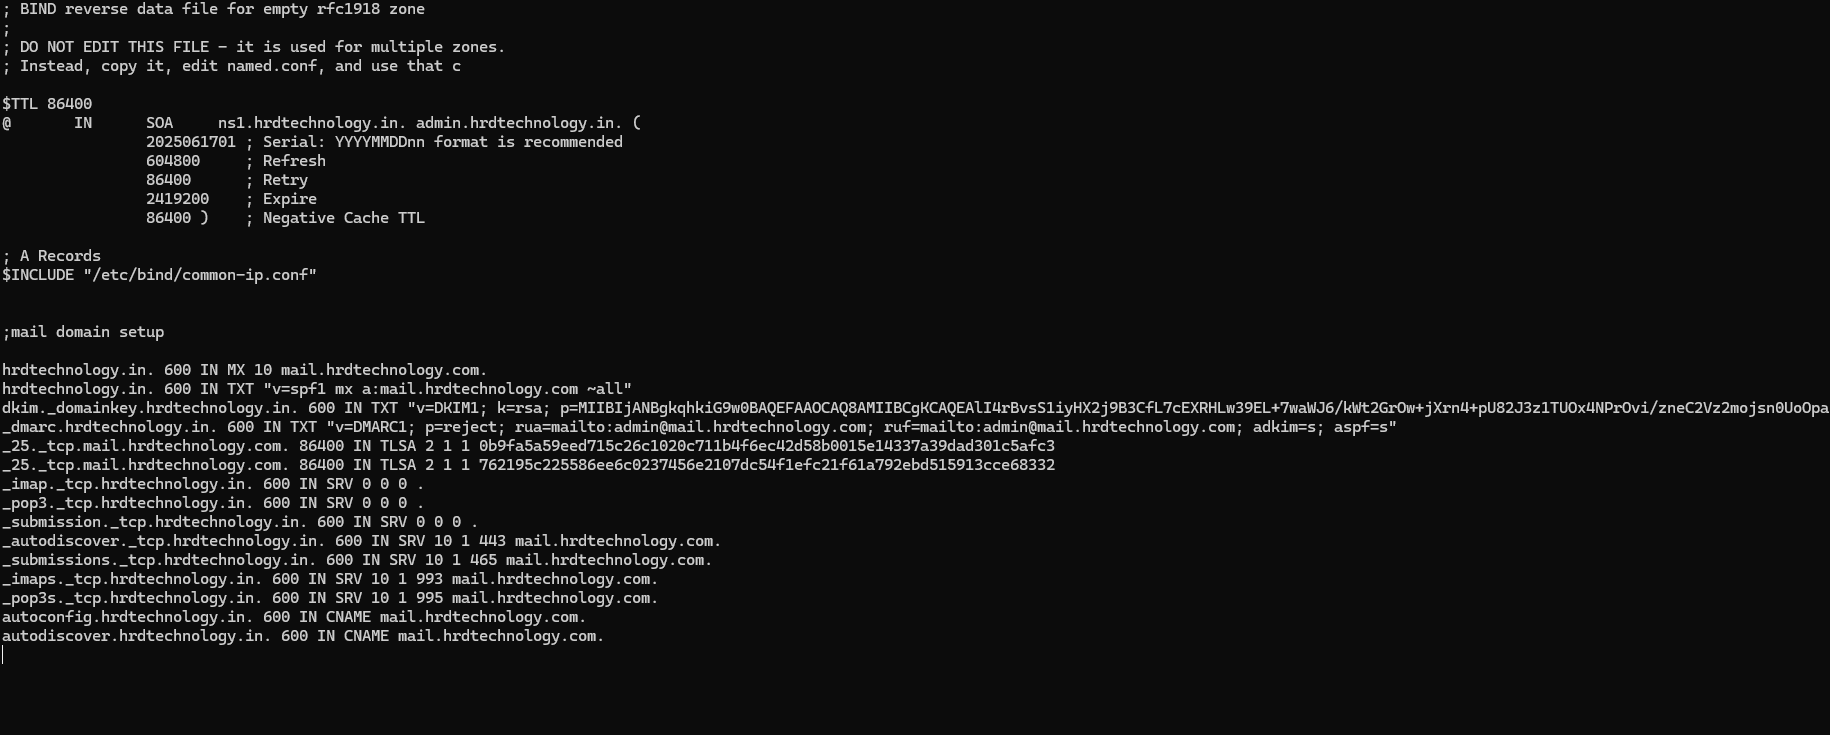
Once you generated the keys click on download zone file, mail will download the zone file like
hrdtechnology.in. 600 IN MX 10 mail.hrdtechnology.com.
hrdtechnology.in. 600 IN TXT "v=spf1 mx a:mail.hrdtechnology.com ~all"
dkim._domainkey.hrdtechnology.in. 600 IN TXT "v=DKIM1; k=rsa; p=MIIBIjANBgkqhkiG9w0BAQEFAAOCAQ8AMIIBCgKCAQEAlI4rBvsS1iyHX2j9B3CfL7cEXRHLw39EL+7waWJ6/kWt2GrOw+jXrn4+pU82J3z1TUOx4NPrOvi/zneC2Vz2mojsn0UoOpau5RBGAv18tEA4BOGzGZntigh/PF5U/0Pmy3gr5X2w7b/XzLU2KiDxTvJOAxrlwpVhoR8q6vHyQF6IzKGL+LHntMfRdJ9U" "iX9mXBtWUmAnFw/n+h63aXS9JrcwdPqBgSnV4jZqjD2vapu25MScY4QGJJruLWdbTldxux5k5NqpFY2ht9OI4uf6ldg7o1dcg+y9/xeOG/HsAh8pg8JnEcNge9E5U7i2TchP//HSDLP9s0MmDOb4fwaXGwIDAQAB"
_dmarc.hrdtechnology.in. 600 IN TXT "v=DMARC1; p=reject; rua=mailto:admin@mail.hrdtechnology.com; ruf=mailto:admin@mail.hrdtechnology.com; adkim=s; aspf=s"
_25._tcp.mail.hrdtechnology.com. 86400 IN TLSA 2 1 1 0b9fa5a59eed715c26c1020c711b4f6ec42d58b0015e14337a39dad301c5afc3
_25._tcp.mail.hrdtechnology.com. 86400 IN TLSA 2 1 1 762195c225586ee6c0237456e2107dc54f1efc21f61a792ebd515913cce68332
_imap._tcp.hrdtechnology.in. 600 IN SRV 0 0 0 .
_pop3._tcp.hrdtechnology.in. 600 IN SRV 0 0 0 .
_submission._tcp.hrdtechnology.in. 600 IN SRV 0 0 0 .
_autodiscover._tcp.hrdtechnology.in. 600 IN SRV 10 1 443 mail.hrdtechnology.com.
_submissions._tcp.hrdtechnology.in. 600 IN SRV 10 1 465 mail.hrdtechnology.com.
_imaps._tcp.hrdtechnology.in. 600 IN SRV 10 1 993 mail.hrdtechnology.com.
_pop3s._tcp.hrdtechnology.in. 600 IN SRV 10 1 995 mail.hrdtechnology.com.
autoconfig.hrdtechnology.in. 600 IN CNAME mail.hrdtechnology.com.
autodiscover.hrdtechnology.in. 600 IN CNAME mail.hrdtechnology.com.
Setup these dns details via admin panel,
If you are using ubuntu without dns panel you can setup in zone file of your domain
In this example my domain is hrdtechnology.in so lets setup via ubuntu.
use bellow command to edit the zone file
nano /etc/bind/db.hrdtechnology.inPaste downloaded zone file in bottom like
After saving make sure zone file is working fine via command
sudo named-checkzone hrdtechnology.in /etc/bind/db.hrdtechnology.inIf there is no any issue in file you will see the ok in output
after that you can restart zone app via command
sudo systemctl restart bind9Open your browser to your admin URL, e.g.